ComfyUI Tutorial: Generate Your First Image & Understand Core Nodes
In this tutorial, you will learn how to generate your first image in ComfyUI and understand the core nodes that power all workflows. By the end, you’ll know how to customize your own pipelines and reproduce consistent results.
Step 1: Load a Text-to-Image Workflow
In the new ComfyUI version, you can start with the built-in templates:
Template → Getting Started → Text-to-Image Workflow (New)
Tip: If you don’t see this template, update your ComfyUI to the latest version. Alternatively, you can use the purple Image-to-Image workflow; the steps are similar.

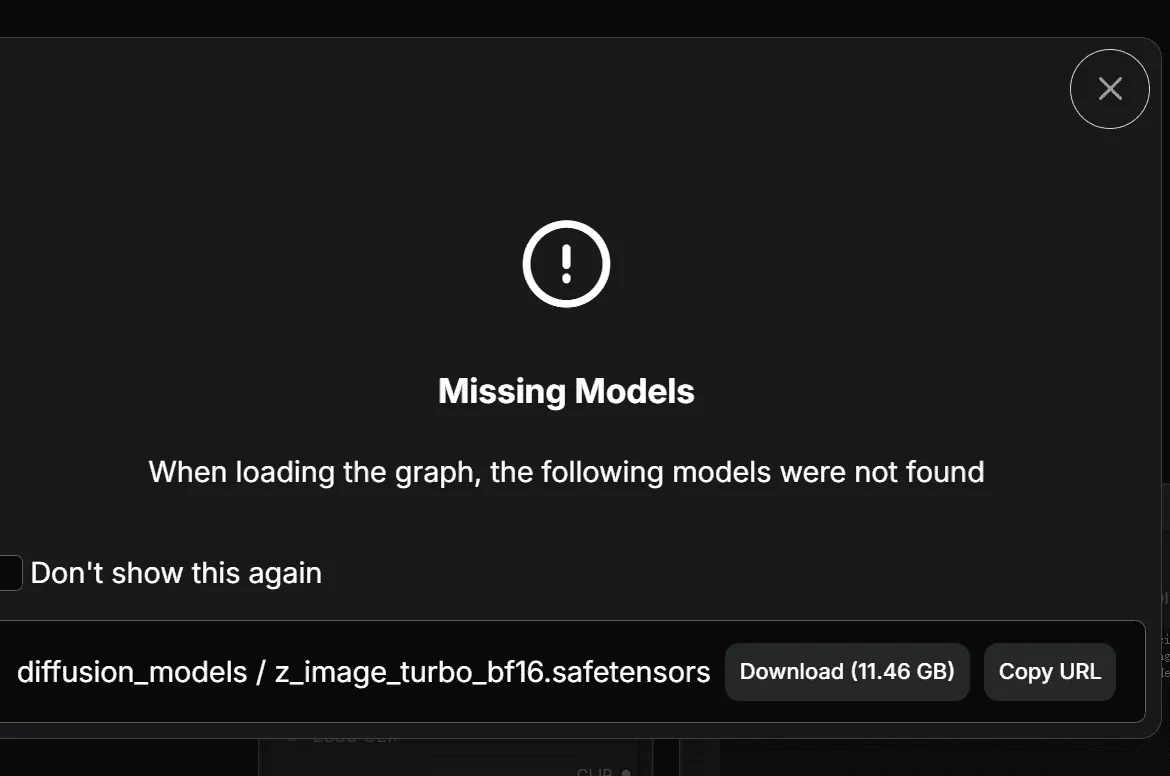
Step 2: Resolve Missing Model Errors
On first launch, ComfyUI usually shows a “missing model” error. This is normal because it doesn’t include models by default.
How to fix it:
- Click the Download button next to the missing model.
- If your GPU has 8 GB VRAM or less, use the FP8 version of the model (introduced later).
- Wait for ComfyUI to download the required files automatically.
Notes:
- If auto-download fails, manually place the models in the correct folders:
- Diffusion models →
ComfyUI/models/diffusion - CLIP models →
ComfyUI/models/clip - VAE models →
ComfyUI/models/vae
- Diffusion models →
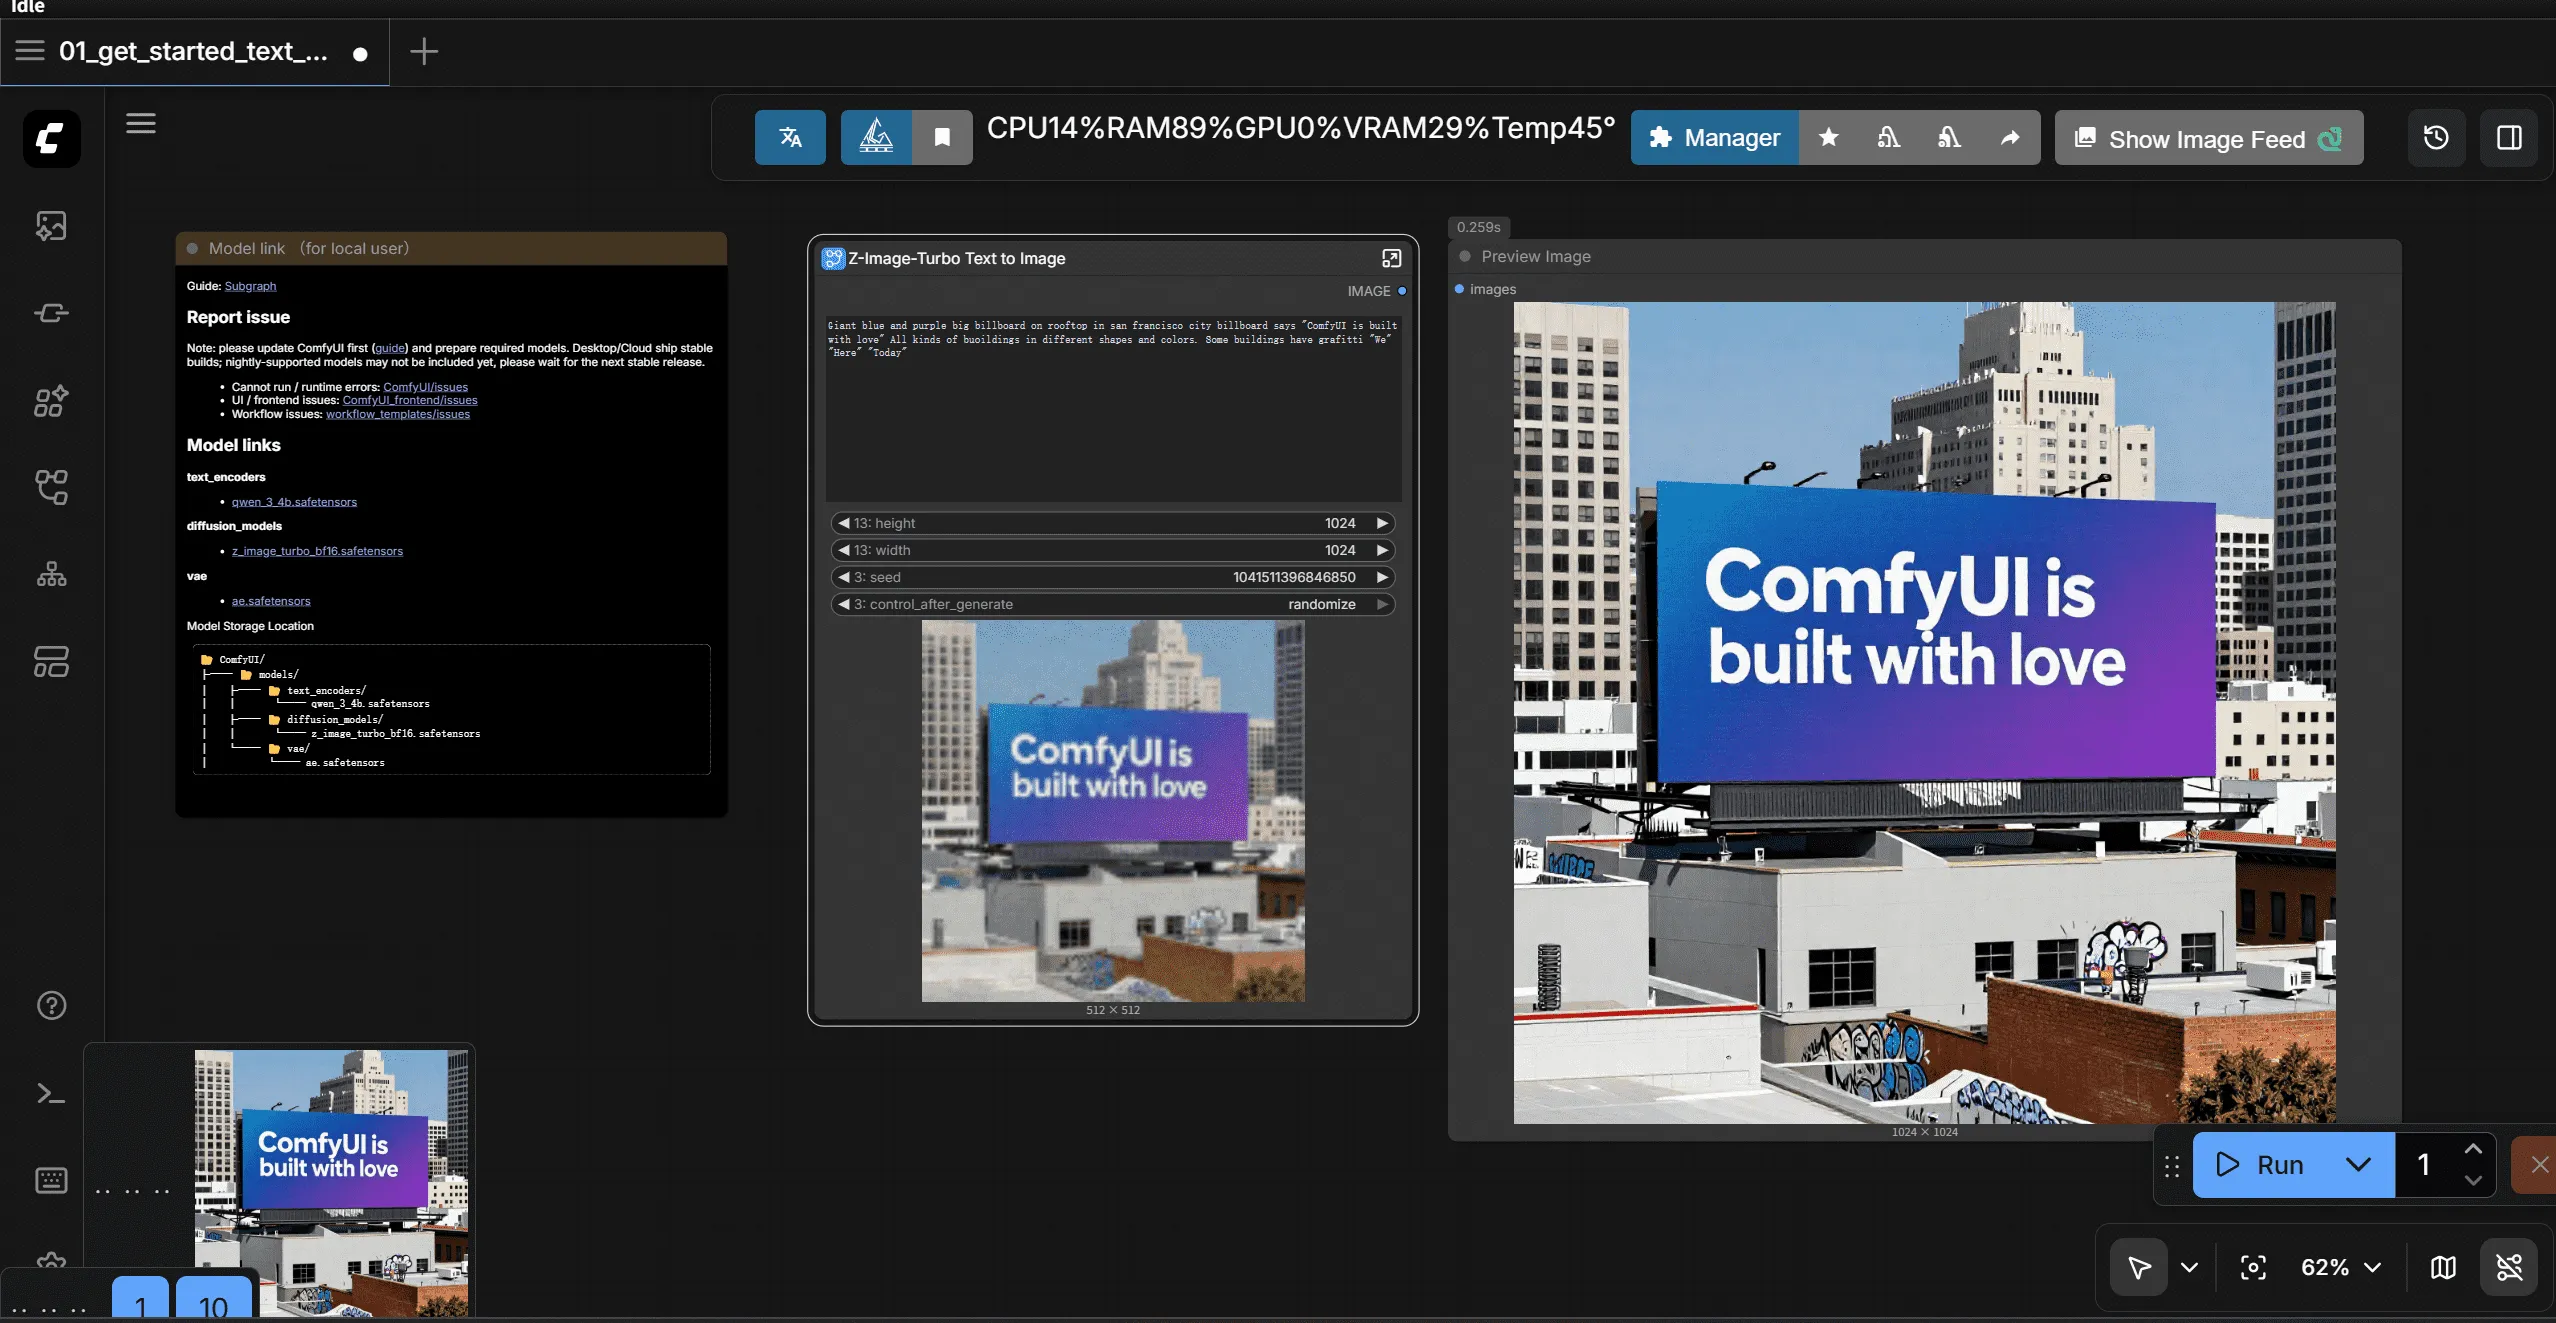
Step 3: Run Your Workflow
- Select the Diffusion model
- Select the VAE model
- Select the CLIP model
Click the blue “Run” button to generate your first image.
Step 4: Access Generated Images
ComfyUI saves images automatically in two locations:
- Assets panel in the left-side navigator
- Local folder:
ComfyUI/output
Quick Tips for Beginners
- Run button is grayed out: Check that all required models are loaded and there are no red errors.
- Speed: NVIDIA GPUs with CUDA are fastest. AMD GPUs need ROCm. CPU-only generation is very slow.
- FP8 models: Recommended for low VRAM GPUs. They reduce memory usage without a big loss in quality.
Understanding Core Nodes
Now that you’ve generated your first image, let’s explore core nodes and their functions.
Nodes are the rectangular blocks on the canvas. Each node contains:
- Inputs: Data or parameters (prompts, model, vectors)
- Outputs: Processed data sent to other nodes
- Parameters: Settings like image resolution or CFG
Nodes are connected using colored lines to form a pipeline.
Core Nodes and Their Functions
| Node | Function |
|---|---|
| Load Diffusion Model | Loads the main AI model (Diffusion) used for image generation. |
| Load CLIP Model | Loads the CLIP text encoder to convert prompts into vectors. |
| Load VAE Model | Loads the VAE decoder for turning latent vectors into visible images. |
| EmptySD3LatentImage | Creates a blank latent canvas. Set width/height (e.g., 512×512, 1024×1024). |
| CLIP Text Encoder (Prompt) | Converts human-readable prompts into numeric vectors for the model. |
| Conditioning ZeroOut | Provides an empty negative prompt input when required. |
| ModelSamplingAuraFlow | Sampler using AuraFlow algorithm to generate images. |
| KSampler | Runs the diffusion process to generate image vectors. |
| VAE Decoder | Converts latent vectors into visible images. |
| Save Images | Saves the final image locally. |
How Nodes Work Together (Simplified)
- Load Diffusion Model → provides the AI model
- Load CLIP Model → provides the text encoder
- Load VAE Model → provides the decoder
- CLIP Text Encoder → converts prompts to vectors
- Empty Latent Image → creates blank latent canvas
- KSampler → generates latent vectors
- VAE Decoder → converts latent vectors to an image
- Save Images → stores the image locally
Dive Deeper: KSampler Node
Seed
- Determines starting noise.
- Same seed → reproducible image.
- Increment/Decrement → small variations for creative exploration.
Steps
- Number of iterations for image generation.
- Higher steps → more detail, slower generation
- Lower steps → faster, less detail
- Modern models may generate high-quality images with fewer steps.
CFG (Classifier-Free Guidance)
- Controls how strongly the model follows your prompt.
- High CFG → closely matches prompt
- Low CFG → more creative variation
- Distilled models may behave differently; experiment is key.
Sampler
- Defines denoising algorithm (e.g., Euler, Euler Ancestral, DPM++ 2M SDE, LCM, Turbo).
- Affects speed, stability, and detail quality.
Scheduler
- Controls noise progression per step.
- Popular choice: Karras, stable and reliable.
Denoise
- Strength of image regeneration (0–1)
- 1 → full generation (text-to-image)
- 0 → no change
- 0–1 → partial redraw (image-to-image, refinement, or style transfer)
FAQ (For Google & Readers)
Q: What models are required for ComfyUI?
A: Diffusion, CLIP, and VAE models. Auto-download works for most templates, or place manually in the ComfyUI/models folder.
Q: Why is the Run button disabled? A: Make sure all required models are loaded and no red error messages are present.
Q: Can I reproduce the same image? A: Yes, set the same seed in KSampler. Use Increment/Decrement for slight variations.
Q: Can I run ComfyUI without NVIDIA GPU? A: Yes, but CPU-only generation is very slow. AMD GPUs require ROCm setup.